CAD/FLAT drawing of design

To create my flat drawing of my final design I used Illustrator. Using this first time was quite tricky at first as it was very different to Photoshop. However, having lectures to teach us how to use it correctly really helped as it made me more confident to use the digital option rather than drawing it.

cad drawings 2 whistlescad drawings whistles

I decided to create two versions of the CAD drawing as I wanted to show a flat version, the design I picked from the line up and a drawing of how the outfit would sit on the model in real life.  I really liked the line up model and real life model as they are both portrayed differently but still give that streetwear/conservative style to the digital work. I definitely see that my digital work has improved within this brief as I have explored various techniques to get that clear, sharp design.


Creating Toile

once finalising my design, I started to create my pattern pieces of the shirt-dress. Whilst making these I came across a few errors which meant I had to change the pieces to fit the design. One of the errors was the collar as firstly I wanted a fly away collar, but it didn’t seem to look right for my style so instead I changed the collar to a two piece, which I was much happier with.

IMG_0088

The block templates were also slightly too tight on on the mannequin so I had to cut around the fabric to see where was best to shape the neck line, giving room for the persons neck.

Once this was all corrected I was able to start sewing the shirt properly. Sewing the shirt was quite easy as the Tech Dem process was similar to this shirt, meaning I was able to finish it quite soon. IMG_0227

However, looking at the finished toile, I felt as though the shirt just sat there and didn’t have anything exciting about it. Because of this, I started to play around with some calico. I was inspired by a certain image that gave me inspiration  to add straps to the front of the shirt, like bra straps, perhaps adding metal rings to them, which would give off the Off-White theme. I also created a long triangular pocket for the shirt which I really liked as well.

even though I had added a few more details to the toile, I feel as though the bottom bit should have some sort of cutting into it, which would create several lines at the bottom of one side.

Line up

Final Line up whistles exAfter developing my designs and research I started to create my Digital line up. For the line up I wanted to use the same silhouette shirt, whilst tweaking each design so each one had their own individuality. Again, looking at the line up you can see the inspiration from Off-White and the conservative look from Whistles which is what I wanted.


Muse

Deciding on the right Muse is important as I want the person to sell the shirt but also be suitable for the age range. For my muse I chose Kendall Jenner as she portrays that streetwear style but also the conservative style which Whistles is more focused on.

She is also very popular in the modelling industry which means the shirt would be on show a lot, through magazines, social media etc which would be seen by various young women.

muse whistles brief 3 ex

Final design of shirt

Before deciding on my final design, I created several designs which incorporated the theme of streetwear/casual. All designs were different to each other but included the text ‘WHISTLES’ logo, big pockets and a shirt dress. I wanted the silhouette to be a straight cut  with exaggerated sleeves and cuffs, so the text and colour of the shirt was the main part of it.

The colour of the shirts would be all white with 10% of fuchsia pink to vamp it up a bit. The fabric will be recycled cotton bed sheets  and the pink parts will be dyed using fabric dye.

Once collaborating my designs together I finally came up with a design that portrayed my theme. The shirt will be a shirt-dress that will come to the knee and be curved at the bottom, the collar will be a two piece with the text WHISTLES around it, and the sleeves will be longer than usual which will roll up thickly. There will also be a pocket which again will have the text WHISTLES on it.

I wanted to keep the silhouette of the shirt simple as Whistles clothing is quite simple itself. However, I decide to exaggerate some parts of the shirt to make it different and pop more, meaning it will capture more eyes.


Developing book/Inspiration

After looking into the brief, and researching whistles, I decided I wanted to create a shirt that was quite different to what they normally make. As my style is more street wear, casual vibe, I wanted to incorporate that into the design which meant my inspiration, theme was going to be based on streetwear, baggy ad over exaggerated.

Looking into the theme more, I looked at designers who inspired me and caught my attention which were Off-White and Prada mainly as they have the bold texts, contrasting stitch and over sized clothing. I also looked at Charlotte Olympia who incorporated newspaper into her designs as again she used the textual technique to create something that looked interesting whilst displaying the historical side.

inspiration ex

inspiration whistles x

After looking into the theme/inspiration, I looked into different styled collars, pockets, cuffs and prints as I wanted to exaggerate these parts of the shirt. By doing this I had a few ideas on what I wanted to exaggerate within the shirt and what I wanted to add to it which meant I was able to start creating a few designs on a potential design.


Creating 3rd Tech Dem- Shirt

During the past 2 weeks we have been creating a shirt out of calico for our next Tech Dem test.

Firstly we were shown how to create collar pattern pieces and shirt pattern pieces before creating the actual shirt. I found creating the collar pieces much more difficult to make than the shirt pieces as there were a lot more lines and processes to do. However, I enjoyed creating the pattern pieces as I was able to learn many new techniques.

Once we had created the pattern pieces we were shown what to sew and were then told to repeat the process that was taught.

Beginning of final brief- Looking into brand Whistles

The final project of first year is based on creating a shirt made out of recycled fabrics for a specific brand. Within this project we were put into groups with some of the other Fashion Designers and others from Fashion Marketing.

The first thing we had to do individually was to find information about our brand (Whistles), such as it’s background, their values, SWOT of the brand and so on. This was the information I had gathered and put together to show my group when we were to meet for the first time.

Once we had met each other as a group we showed each other the information we had and came up with a few ideas on what sort of trend we could go down. We were told we had to create a presentation as a team which would inform the tutors about the brand and the future trends we could possibly use.

After a week went by, we all met up again and practised what we would say before presenting. During the presentation, we all took turns to speak and explain each slide, explaining about the past, who runs the brand, what their SWOT is and the future colour trends vs. the past colour trends.

Once this was completed we were able to start our work individually until we had to meet up again.

Brief 2- Evaluation of bag

Once we had finished the process of making the bag, we filmed the final bag and its uses.


Overall, I am very pleased with the outcome of the design as it is what we hoped for. Even though there were some difficulties with the bag, I think it met the targets we wanted. The colours work well together as well and are visible in the day time and night time for a runner.

Throughout the process of making the bag, there were a few issues within the group with people not putting in a lot of contribution. However, even though this happened, the bag was finished on time, and we presented well as a team and made new friends.


Brief 2- Making bag

After creating the cardboard version of our bag, we got our fabrics and began the process of making the actual bag.

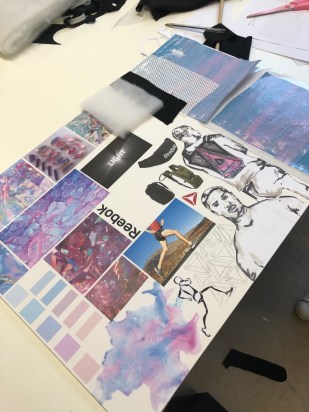
Before making the bag we had to create the screen prints which would be on the main bag to create the ombre, pastel finish. This part was mainly done by Aanya as it was in her department, textiles. Alice and myself helped her with mixing the colours, and washing everything up so the fabrics wouldn’t get dirty. thumbnail_image1-3.jpg

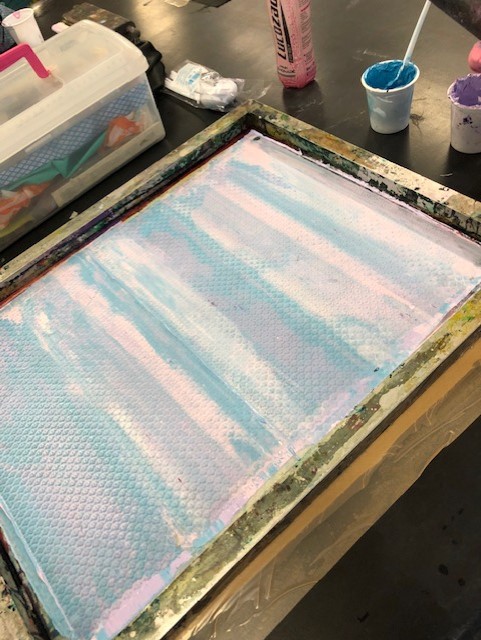
After several goes, we finally created enough screen prints on the fabric which would be the main bag and bum bag. Once the prints had dried we were all able to start cutting out the pattern pieces and putting them between PVC to create a waterproof material. Whilst the fashion and textile people were doing this, the product team were creating the metal pieces to create the logo and writing.

thumbnail_image1-7.jpg

After cutting the pieces out we ironed the PVC together and began to sew the bag.

sewing the bag was quite challenging as the fabric wasn’t the easiest to sew through, especially when sewing the zips together. thumbnail_image1-8.jpg

Once we had sewn the main bag and bumbag one of us started to hand stitch the metal logo and writing onto the bag whilst the rest of us created the board for the presentation.

thumbnail_image1-5.jpgthumbnail_image1-1

After several hours of sewing the bag together by myself and the other fashion members, we went onto creating the straps and adding the buckles to them. The straps were quite easy to create compared to the rest of the bag was the material was much more flexible, which is what we wanted.

Finally after finishing the straps the team added reflective strips to the front and that was the finishing touch to the bag.
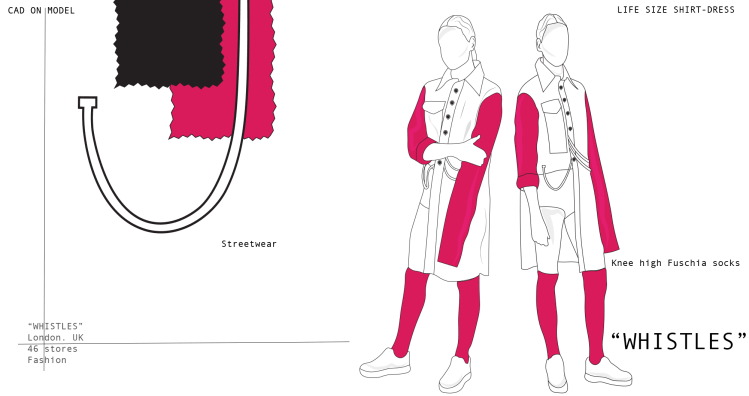
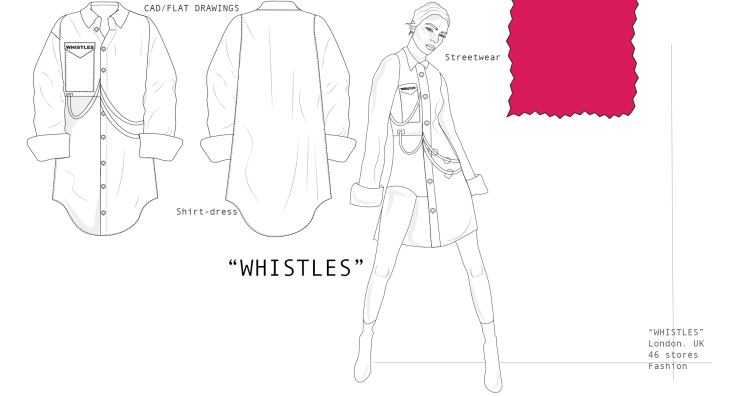
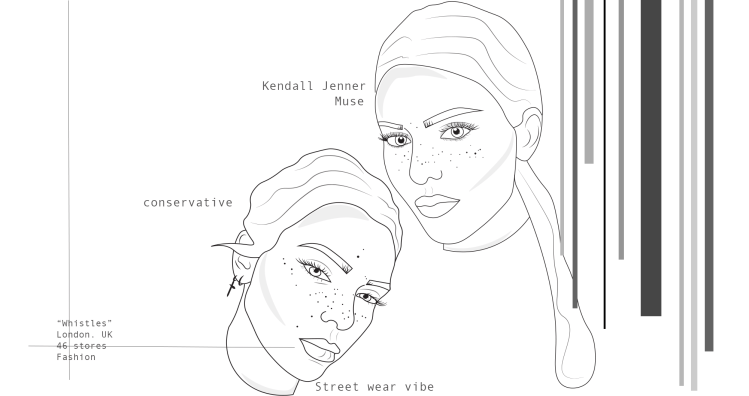
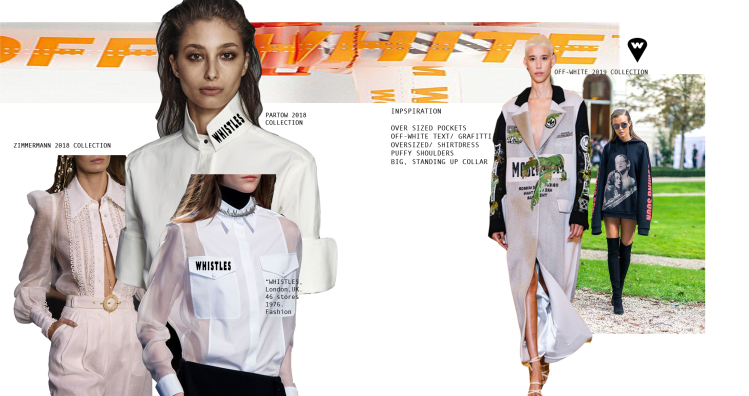
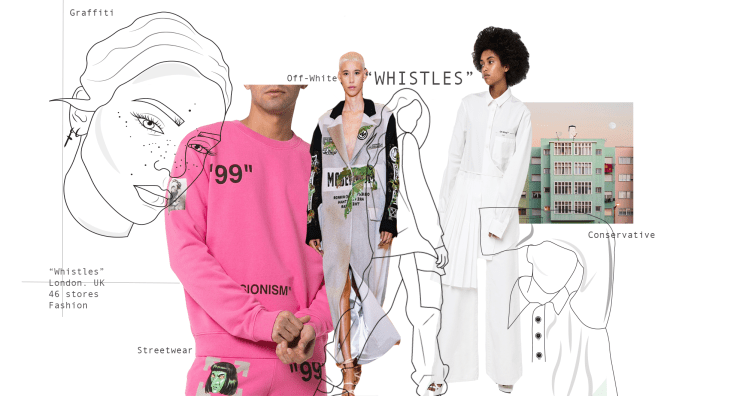
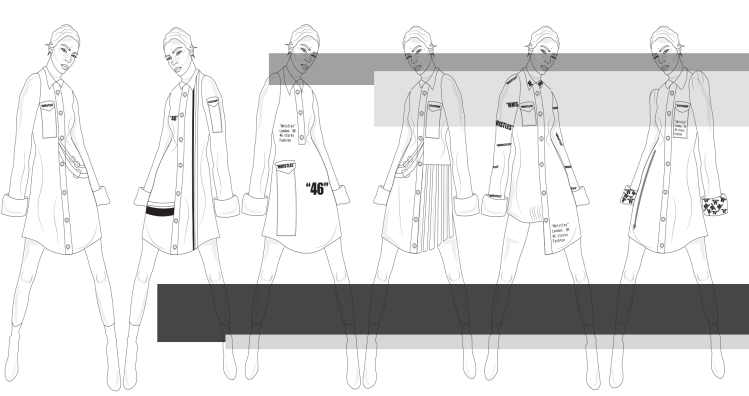
Design a site like this with WordPress.com
Get started